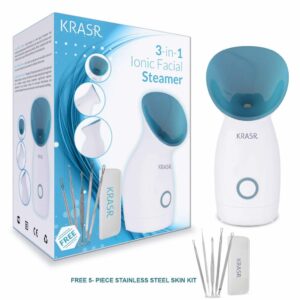
The importance of facial steaming is often overlooked. It is easy to perform, cost-effective, and brings many benefits. A 10-minute facial steam session at home could save you a big bill that comes at the end of a spa therapy whilst receiving the same benefits. Before discussing the steps required for facial steaming, here’s a quick description of the benefits that facial steaming has for your skin.
Benefits of facial steaming
- Pore Cleansing - Steaming opens up your pores, thus, softening your blackheads. This causes the dirt and oil within the blackheads to be excreted and thus, cleansing your face. Softer blackheads are also easier to remove. Opening your pores also unclogs pores by releasing acne-causing bacteria, dead skin cells, and other impurities, and prevents the formation of any kind of acne.
- Circulation - Due to the warmth of the steam and the increase in perspiration, the blood vessels get dilated and the blood circulation increases. With the boosted blood flow, the delivery of oxygen to your skin increases and the skin gets better nourishment. This results in a natural glow.
- Skin hydration - Steaming increases the oil production of the skin which helps in naturally moisturizing the face.
- Permeability of the skin - Steaming increases the permeability of the skin and skin becomes more receptive to topicals. This means that you get better results for every skincare product implemented after steaming.
- Sinus congestion - Steaming gets rid of sinus congestion and the side effects caused by it, such as headaches. Accommodating certain essential oils along with your steaming will yield increased efficiency.
Setting up your steam

Step 1 - Cleansing and exfoliating
Before you begin the steaming process, gently wash your face with light acids that slightly exfoliate your face. Acids such as Alpha/Beta hydroxy acids gently exfoliate your skin and cleanse your pores.
Step 2 - Prep your steam
Pour water into your Nano Ionic Facial Steamer by Krasr. Keep towels and tissues close by as they can come in handy.
Step 3 - Choosing the right essential oils
To maximize the efficiency of the steam, you can add essential oils to the water. Three to five drops should suffice for each session.
- Rose - Aids with moisturizing the dry skin
- Grapefruit - Balances skin complexion
- Tea tree oil - Helps with acne
- Eucalyptus - Unclogs sinus
Step 4 - Begin your steam
Place your head 5 - 10 inches away from the steam nozzle. Carry on 5 sets of 2 minutes as it allows your skin to breathe.
Caution: do not place your face too close to the steam nozzle as it could cause burns and inflammation to your skin.
Step 5 - Apply a mask of your liking
Apply a mask immediately after your steaming session to gain maximum benefits. Different ingredients in the face mask offer different benefits. Choose your face mask based on the ingredients.
- Eggs - Deal with acne
- Turmeric - Aids with hyperpigmentation
- Oatmeal & baking soda - unclogs pores
- Banana - Manages oily skin
- Cucumber & aloe vera - Moisturizes dry skin
- Avacado & cocoa powder - Anti-wrinkle properties
Step 6 - Apply a moisturizer
Applying a moisturizer is a great way to finish your steaming session. Before you moisturize, sprinkle a few drops of cold water on your face to close your pores (do the same when rinsing your mask). This will keep your pores unclogged. Be sure to never skip on the moisturizer as you could lose the benefits of the steaming process.


